In Plesk, go to Extensions and search for Let’s Encrypt.
Extensions_-_Let_s_Encrypt
Click on Let’s Encrypt and then click Get it free (or Install).
Once installed, go to Tools & Settings > SSL/TLS Certificates (under Security).
Click Let’s Encrypt.
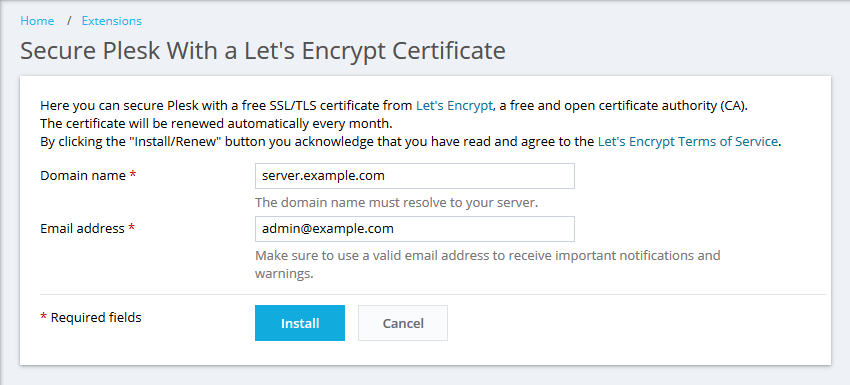
Make sure the Domain name and Email address fields contain a valid information:
Domain name can be a server hostname (preferable) or any other (sub)domain name hosted on the server.
It will be used as an entry point to Plesk over port 8443 (for example, https://server.example.com:8443 ) for all Plesk users (customers, resellers, etc.) who have access to Plesk.
Note: The hostname/domain name must be resolved to a public IP address of the Plesk server from the Internet. If in doubt,
check your hostname/domain name availability using DNS Lookup by MxToolBox.
If a domain, e.g. example.com, is using permanent www redirection, specify www.example.com as Domain name.
Email address will be used to receive important notifications and warnings.
Click Install. At this stage, an SSL certificate from Let’s Encrypt is generated and set to secure Plesk on port 8443. This certificate will be auto-renewed every 90 days. Here is the final look:
Now, access Plesk over https://server.example.com:8443.